A Delightful Spring Dessert
Hey there, fellow dessert enthusiasts! Get ready to discover the most adorable and delicious Easter treat that’ll have everyone at your celebration asking for seconds. Let me introduce you to the Easter Dirt Cake Casserole – it’s like bringing a garden party to your dessert table!
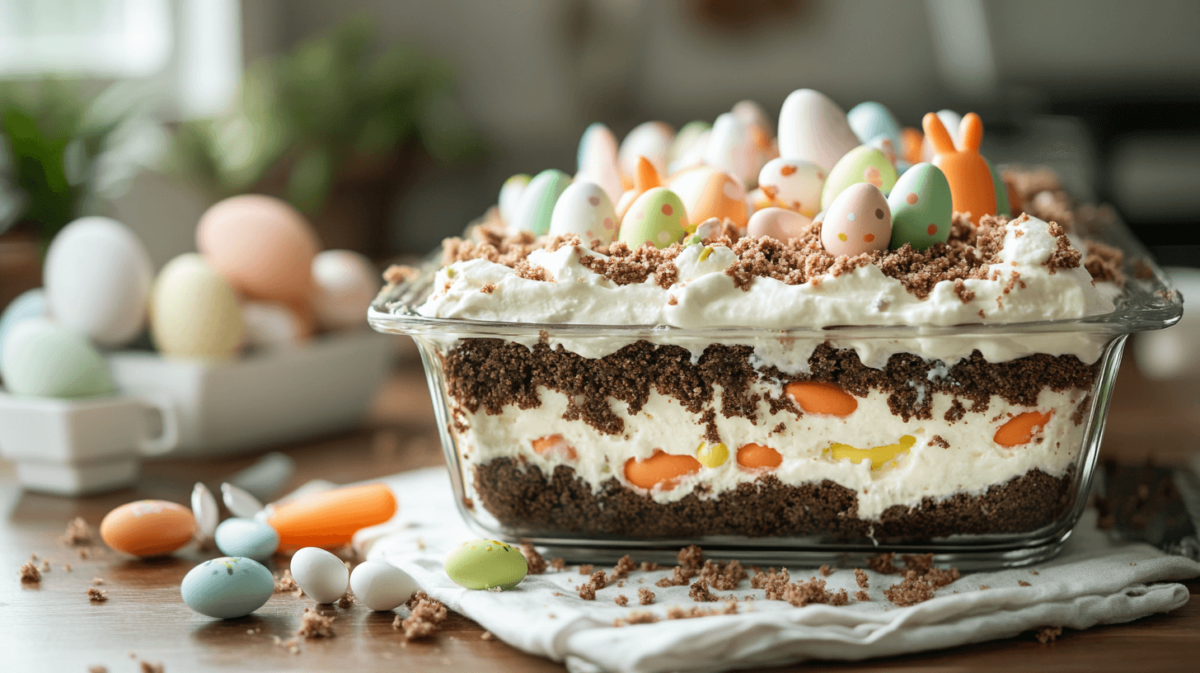
What is Easter Dirt Cake Casserole?
Picture this: layers of crushed cookies resembling rich soil, velvety cream cheese filling as smooth as spring clouds, and adorable Easter decorations that make everyone smile! This no-bake dessert is basically childhood happiness in a dish, but with a sophisticated twist that even grown-ups can’t resist.
“Some of the best memories are made in the kitchen, especially when you’re creating something that makes people’s eyes light up with joy!”
Why This Dessert is Perfect for Easter Celebrations
Let’s be honest – Easter celebrations need something special, and this dirt cake casserole delivers big time! It’s not just another dessert; it’s an experience that brings together:
- Interactive fun for the whole family
- Make-ahead convenience
- Instagram-worthy presentation
- Crowd-pleasing flavors
Essential Ingredients for Your Easter Dirt Cake
Before we dive into the magic-making process, let’s gather our ingredients. Here’s everything you’ll need:
| Category | Ingredients | Quantity |
|---|---|---|
| Cookies | Chocolate sandwich cookies | 2 packages (14.3 oz each) |
| Dairy | Cream cheese | 16 oz |
| Butter (unsalted) | 1/2 cup | |
| Milk | 2 cups | |
| Pudding | Vanilla instant pudding | 2 (3.4 oz) boxes |
| Whipped | Cool Whip | 12 oz |
| Decorative | Easter candy eggs | 1 package |
| Candy carrots | 1 package | |
| Easter-themed sprinkles | As needed |
Base Layer Components
The foundation of our dirt cake is crucial – it’s all about achieving that perfect “soil” texture. The secret? Crushing those cookies until they’re fine enough to look like dirt but not so powdery that they lose their texture. Pro tip: leave some slightly bigger pieces for that authentic garden feel!
Creamy Filling Ingredients
Now, let’s talk about what makes this dessert irresistibly creamy. The filling is a heavenly mixture that’s going to make your taste buds dance! We’re combining cream cheese, pudding, and whipped topping to create layers that are:
- Light as a cloud
- Rich in flavor
- Perfectly balanced in sweetness
Here’s a cool fact: the cream cheese doesn’t just add richness – it also helps stabilize the filling, making this dessert perfect for preparing ahead of time!
Step-by-Step Recipe Instructions
Preparing the Cookie Base
Time to get your hands dirty (in a good way)!
- Place your chocolate sandwich cookies in a food processor and pulse until they resemble soil. No food processor? No problem! Put the cookies in a ziplock bag and crush them with a rolling pin – it’s quite therapeutic!
- Set aside about 1 cup of cookie crumbs for the top layer – this will be our final “dirt” sprinkle.
“The key to a perfect dirt cake is in the layers – like a garden, each layer should be distinct yet work together to create something beautiful!”
Making the Cream Filling
Let’s create that dreamy filling that makes this dessert absolutely unforgettable:
- In a large bowl, beat the softened cream cheese and butter until fluffy (about 2 minutes)
- Gradually add milk while mixing to keep everything smooth
- Add vanilla pudding mix and continue beating until well combined
- Fold in the whipped topping gently – we want to keep all that lovely air in there!
The filling should be smooth enough to spread but firm enough to hold its shape. Think of it as creating clouds in your dessert!
Creating the “Dirt” Layer
Now comes the fun part – let’s build our edible garden! Think of this process as creating layers in a terrarium, but with delicious treats instead of real plants:
- Spread a layer of cookie crumbs on the bottom of your 9×13 casserole dish
- Add half of your creamy filling, spreading it gently like you’re frosting a cloud
- Sprinkle another generous layer of cookie crumbs
- Add the remaining filling
- Top with your reserved cookie “dirt”
Pro tip: Use the back of a spoon to smooth each layer, just like a gardener carefully tending their soil!

Easter-Themed Decoration Tips
Time to transform your dirt cake into an Easter wonderland! Here’s where your creativity can really shine:
- Create small indentations in your “dirt” for placing Easter eggs
- Position candy carrots so they look like they’re growing from the soil
- Add bunny-shaped cookies or chocolate figures
- Sprinkle pastel-colored candies to mimic spring flowers
“Decorating this cake is like creating a miniature Easter garden – let your imagination run wild and have fun with it!”
Common Problems and Solutions
Texture Issues and Fixes
Let’s tackle some common challenges you might face:
| Problem | Solution |
|---|---|
| Filling too runny | Chill for 30 minutes before continuing |
| Cookies too finely crushed | Mix in some coarser crumbs for texture |
| Layers mixing together | Chill between layers for 15 minutes |
| Decorations sinking | Place them just before serving |
Storage and Make-Ahead Tips
Planning is key for the perfect Easter dessert! Here’s what you need to know:
- Make-ahead time: Up to 24 hours
- Storage temperature: 35-40°F (refrigerator)
- Container type: Airtight with lid
- Decoration timing: Add delicate items just before serving
Variations and Creative Twists
Dietary Modifications
Everyone should be able to enjoy this festive treat! Here are some adaptations:
- Gluten-Free Version: Use GF chocolate sandwich cookies
- Dairy-Free Option: Substitute with:
- Dairy-free cream cheese
- Coconut whipped cream
- Plant-based milk
- Lower Sugar: Use sugar-free pudding mix and reduced-fat cream cheese
Seasonal Adaptations
This versatile dessert can be modified for any occasion!
- Summer: Add gummy worms and flowers
- Halloween: Include spooky candy decorations
- Christmas: Use red and green sprinkles with candy canes
- Valentine’s: Add heart-shaped candies and pink coloring
Serving and Presentation Ideas
Kid-Friendly Plating Suggestions
Make serving time extra special with these fun ideas:
- Individual Mason Jar Servings
- Layer ingredients in clear jars
- Add personalized name tags
- Include a mini plastic shovel as a spoon
- Garden Party Setup
- Use terracotta-colored plates
- Add edible flower garnishes
- Include little garden signs

Nutritional Information and Dietary Considerations
Let’s be transparent about what’s in this delightful treat:
| Nutrient | Per Serving (1/12 of cake) |
|---|---|
| Calories | 385 |
| Total Fat | 22g |
| Carbohydrates | 45g |
| Protein | 4g |
| Sugar | 32g |
| Fiber | 1g |
Remember, this is a special occasion dessert – it’s all about balance and enjoyment!
“Life is about creating moments of joy, and sometimes that means enjoying a perfectly decorated piece of dirt cake!”
Tips for Mindful Enjoyment:
- Serve reasonable portions
- Share with friends and family
- Focus on the experience and fun
- Balance with other healthy choices
And there you have it – your complete guide to creating the perfect Easter Dirt Cake Casserole! This dessert isn’t just about the taste; it’s about creating memories, sharing laughs, and bringing a touch of whimsy to your Easter celebration. Whether you’re a seasoned baker or trying this for the first time, remember that the most important ingredient is the love and joy you put into making it!
Frequently Asked Questions
Can I make Easter Dirt Cake Casserole ahead of time?
Yes! You can prepare this dessert up to 24 hours in advance. Just keep the decorative toppings separate and add them right before serving to maintain their fresh appearance.
How long does Easter Dirt Cake Casserole last in the fridge?
When properly stored in an airtight container, your dirt cake will stay fresh for up to 3-4 days in the refrigerator. However, the texture is best within the first 48 hours.
Can I freeze this dessert?
While you can freeze the basic layers, I don’t recommend freezing the fully assembled dessert. The texture of the cream filling might change, and the decorations won’t look their best after thawing.
What if I can’t find Easter-themed candies?
No worries! You can use:
- Regular chocolate eggs
- Colorful jellybeans
- Spring-colored M&Ms
- Chocolate-covered almonds painted like eggs
Why is my filling not firm enough?
This usually happens when:
- The cream cheese wasn’t at room temperature when mixing
- The pudding wasn’t fully set
- Too much milk was added
“Remember, baking questions are like garden problems – there’s always a solution if you know where to look!”
Can I make this in individual servings?
Absolutely! Use clear plastic cups or mason jars for individual portions. This works great for parties and makes serving much easier.
Conclusion
There you have it, friends – your complete guide to creating the most enchanting Easter Dirt Cake Casserole! This dessert is more than just a sweet treat; it’s an opportunity to bring smiles to faces and create lasting memories with loved ones.
Remember these key takeaways:
- Plan ahead and gather all ingredients before starting
- Don’t rush the layering process
- Let your creativity shine in the decorations
- Most importantly, have fun with it!
Whether you’re making this for a family gathering, an Easter celebration, or just because you want to bring some spring joy to your table, this dirt cake casserole is sure to be a hit. And hey, if some of the layers aren’t perfect or your decorations don’t look exactly like the pictures, that’s totally okay! After all, the best recipes are the ones made with love and bring people together.
“In the garden of life, the sweetest moments are often shared around a table with those we love.”
So go ahead, give this recipe a try, and watch as your Easter celebration transforms into something extra special. And don’t forget to snap a picture before everyone digs in – trust me, this dessert disappears quickly!
Remember to tag your creations on social media – I’d love to see how your Easter gardens turn out! 📸 And don’t forget, the best part about this dessert is that even if it doesn’t look perfect, it’ll still taste amazing. After all, real gardens aren’t perfect either, and that’s what makes them beautiful!
Happy baking, and may your Easter be filled with delicious moments and joyful memories!
More Sweet Treats to Try
If you’re loving the festive and indulgent Easter Dirt Cake Casserole, then you’ll definitely want to explore these other delightful desserts! For a fruity and refreshing twist, check out the Lemon Cream Cheese Dump Cake—a tangy and creamy treat that’s incredibly easy to make. If you’re craving something rich and chocolatey, the Decadent Chocolate Coconut Poke Cake is a must-try with its luscious layers of flavor. For those who enjoy a touch of nostalgia, the Rice Krispy Millionaires Bars combine crunch and caramel for a perfect bite. If cheesecake is your weakness, then the Creme Brulee Cheesecake is an elegant and creamy delight. And for a spring-inspired dessert, the Hawaiian Pineapple Carrot Cream Cake brings a tropical twist to a classic favorite. Happy baking!
Easter Dirt Cake Casserole
Ingredients
- 28.6 oz Chocolate sandwich cookies 2 packages |
- 16 oz Cream cheese softened
- 1/2 cup Unsalted butter softened
- 2 cups Cold milk
- 6.8 oz Instant vanilla pudding mix 2 boxes
- 12 oz Whipped topping
- 1 package Easter candy eggs
- 1 package Candy carrots
- |As needed Easter-themed sprinkles
Instructions
- 1. Crush chocolate cookies in a food processor until fine crumbs form
- 2. Beat cream cheese and butter until fluffy (2 minutes)
- 3. Gradually add milk while mixing
- 4. Add pudding mix and beat until well combined
- 5. Fold in whipped topping gently
6. Layer in 9×13 dish:
- – Cookie crumbs
- – Half cream mixture
- – More cookie crumbs
- – Remaining cream mixture
- – Top with final cookie crumbs
- 7. Decorate with Easter candies
- 8. Refrigerate for at least 4 hours