Cooking a turkey that’s juicy, flavorful, and tender can sometimes feel like chasing a unicorn. Many home cooks have struggled with dry, flavorless turkey, especially during the holiday season. But what if I told you there are tried-and-true secrets to keeping your turkey moist every time? Let’s dive into the juicy details—pun intended!
Introduction to Cooking the Perfect Turkey
A perfectly cooked turkey is the crown jewel of any feast. But achieving that perfection can feel overwhelming, especially with so much advice floating around. The truth is, keeping a turkey moist is all about preparation, technique, and timing. Whether you’re hosting Thanksgiving, Christmas, or simply want to impress your family, this guide has got you covered.
Here’s the deal: a moist turkey starts before you even put it in the oven. Preparation is key, and a few science-backed techniques can make all the difference. Let’s uncover the secrets step by step.
Why Does Turkey Dry Out During Cooking?
If you’ve ever wondered why your turkey ends up resembling a dry sponge, you’re not alone. The culprit often lies in the cooking process itself.
The Science Behind Dry Turkey
Turkey meat, especially the white meat, has a low fat content. When cooked too long or at the wrong temperature, the moisture inside the meat evaporates, leaving you with a dry bird. The proteins in turkey muscle fibers contract and squeeze out water as the internal temperature rises. It’s like wringing out a wet towel—except you’re left with dry, stringy meat.
Common Mistakes That Lead to Dry Turkey
Mistakes happen, but some are more common than others. Here are the big ones:
- Overcooking: Going beyond the recommended internal temperature is the fastest way to dry out your bird.
- Skipping Brining: Without this step, the meat doesn’t have the extra moisture to combat heat.
- Not Resting the Turkey: Cutting into it immediately after cooking causes the juices to spill out instead of redistributing into the meat.
- Using the Wrong Temperature: Cooking at too high a temperature can dry out the turkey’s surface while leaving the inside undercooked.
“Turkey is like a marathon runner; it needs proper hydration before and during the cooking process.”

Essential Preparation Tips for Moist Turkey
Preparation isn’t just about seasoning; it’s about setting your turkey up for success. Think of it like a spa day for your bird.
Choosing the Right Turkey: Fresh vs. Frozen
The type of turkey you choose can make a difference. Fresh turkeys tend to have better texture and flavor, but frozen ones can work just as well if handled properly. Just remember:
- Fresh Turkeys: They’re often juicier but need to be used quickly.
- Frozen Turkeys: Require proper thawing, which can take 2-4 days depending on size.
When in doubt, choose the bird that fits your budget and timeline.
The Role of Brining: Wet Brine vs. Dry Brine
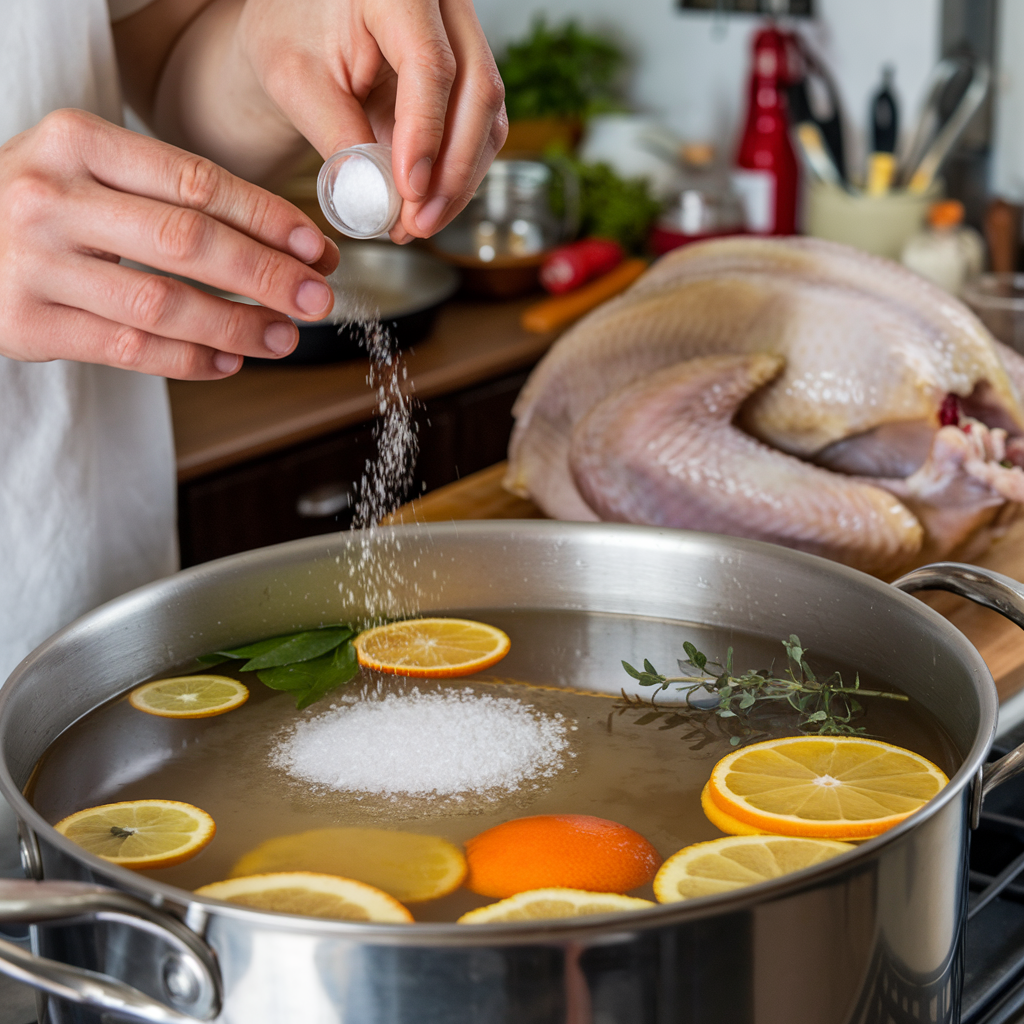
Brining is like giving your turkey a hydration boost. By soaking or seasoning the bird with salt, you help it retain moisture during cooking. But which brine should you choose?
- Wet Brine: Involves soaking the turkey in a saltwater solution for 12-24 hours. Add herbs, citrus, and spices for extra flavor. Pro tip: Make sure you have enough fridge space for this!
- Dry Brine: Rub salt directly onto the turkey and let it sit uncovered in the fridge for 24-48 hours. It’s less messy and allows the skin to crisp up beautifully.
Both methods work wonders, so pick the one that suits your style.
Importance of Proper Thawing
If you’re starting with a frozen turkey, thawing is non-negotiable. A half-thawed turkey will cook unevenly, leaving parts dry and others undercooked. Here’s how to do it right:
- Fridge Thawing: Allow 24 hours for every 4-5 pounds of turkey.
- Cold Water Thawing: Submerge the wrapped turkey in cold water, changing the water every 30 minutes. This method is faster but requires constant attention.
“A well-thawed turkey is like a blank canvas, ready to soak in all the flavors you add.”
Cooking Techniques for a Moist Turkey
The cooking method you choose can make or break your turkey. Let’s talk about the best ways to lock in that precious moisture.
Low and Slow Roasting: Does It Work?
Cooking your turkey at a lower temperature for a longer period helps retain its juices. This method ensures even cooking and prevents the outer layers from drying out before the inside is done. Aim for an oven temperature of around 325°F and use a meat thermometer to monitor doneness.
The Benefits of Spatchcocking
Spatchcocking is a fancy term for butterflying your turkey. By removing the backbone and flattening the bird, you allow it to cook more evenly and quickly. This method also ensures that both the white and dark meat stay juicy.
Using Foil or a Roasting Bag
Covering your turkey with foil during the first half of cooking can shield it from direct heat and retain moisture. A roasting bag works similarly, creating a mini steam chamber that locks in juices. Just remember to uncover or cut the bag during the last 30 minutes for crispy skin.
The Role of Seasoning in Retaining Moisture
Seasoning isn’t just about flavor—it also plays a role in keeping your turkey juicy. The right combination of ingredients can enhance the bird’s natural moisture.
Butter or Oil: Which Is Better?
Both have their merits, but butter adds a rich flavor while oil ensures even browning. For the ultimate turkey, try this combo:
- Under the Skin: Gently rub softened butter mixed with garlic and herbs under the skin.
- Over the Skin: Brush the turkey with olive oil to promote crispiness.
Herbs, Spices, and Aromatics
Stuff the cavity with aromatics like onions, garlic, citrus, and fresh herbs. This not only adds moisture but also infuses the meat with delicious flavors.
“Aromatic ingredients are like a symphony for your turkey—they harmonize moisture and flavor perfectly.”
The Importance of Basting: Myth or Must?
Basting is one of those turkey traditions that divides cooks. Some swear by it, while others say it’s unnecessary. So, what’s the truth?
How Often Should You Baste?
Basting involves spooning or brushing the turkey’s juices over its surface to keep it moist. But here’s the catch: opening the oven frequently to baste can lower the temperature, extending cooking time. A good rule of thumb? Baste every 30-45 minutes for best results.
Alternatives to Traditional Basting
If you want to avoid constant oven-checking, consider these alternatives:
- Butter Basting: Rub a mix of melted butter and herbs under the skin before roasting.
- Self-Basting Turkeys: Some turkeys come pre-brined or injected with a solution to maintain moisture.
“Think of basting as a little TLC for your turkey—but don’t overdo it!”
Monitoring Temperature: The Key to Success
No matter how well you prepare, monitoring the temperature is the ultimate game-changer when it comes to keeping your turkey moist. After all, even the best techniques can’t save a bird that’s been overcooked.
Using a Meat Thermometer Correctly
A meat thermometer is your best friend when cooking turkey. Insert it into the thickest part of the breast (without touching the bone) to get an accurate reading. The USDA recommends an internal temperature of 165°F for the breast and 175°F for the thighs. Remember, the turkey will continue to cook slightly as it rests.
Ideal Cooking Temperatures for Turkey
Here’s a quick guide to safe and juicy cooking temperatures:
- Whole Turkey: 165°F (breast), 175°F (thighs)
- Turkey Breast Only: 165°F
- Stuffing (if inside the bird): 165°F
Using a thermometer takes the guesswork out of cooking and ensures your turkey isn’t left in the oven too long.
“Cooking turkey without a thermometer is like driving blindfolded—don’t risk it!”
Resting the Turkey: Why It’s Crucial
Resting might sound like an optional step, but it’s actually a make-or-break moment for your turkey’s juiciness.
How Long Should Turkey Rest?
Once you remove the turkey from the oven, resist the urge to carve it right away. Let it rest for at least 20-30 minutes. This allows the juices to redistribute throughout the meat, making every bite tender and flavorful.
What Happens If You Skip Resting?
Cutting into a hot turkey causes the juices to spill out onto the cutting board instead of staying locked in the meat. The result? Dry slices that no amount of gravy can save. Think of resting as the turkey’s time to regroup and shine.
“A rested turkey is a happy turkey—and a delicious one, too!”
Troubleshooting Common Turkey Problems
No matter how much you prepare, sometimes things don’t go as planned. Don’t worry—you can still save the day! Here’s how to tackle common turkey problems.
What to Do If Your Turkey Is Already Dry
If you’ve accidentally overcooked your turkey and it’s dry, try these quick fixes:
- Gravy to the Rescue: Generously pour warm gravy over the meat to add moisture and flavor.
- Serve with Moist Sides: Pair the turkey with creamy mashed potatoes or a juicy cranberry sauce to mask the dryness.
- Make a Turkey Salad: Shred the dry meat and mix it with mayonnaise, mustard, and herbs for a flavorful turkey salad.
How to Fix Undercooked Turkey
Discovering pink meat when carving your turkey can be stressful, but it’s fixable:
- Return to the Oven: Slice off the undercooked portions and return them to the oven at 325°F until fully cooked.
- Microwave Method: For smaller portions, use a microwave to finish cooking quickly.
“Remember, even culinary mishaps can turn into opportunities for creativity.”

Serving and Carving Tips for a Moist Turkey
Now that your turkey is cooked to perfection, it’s time to serve it like a pro. Presentation and carving can elevate your meal even further.
The Right Way to Carve a Turkey
- Use a Sharp Knife: A dull knife can tear the meat and make it look unappetizing.
- Remove the Legs First: Cut at the joints to separate the legs and thighs.
- Slice Against the Grain: This keeps the meat tender and easier to chew.
Plating Tips to Retain Juiciness
- Keep Covered: Cover the carved turkey with foil until it’s time to serve to retain warmth and moisture.
- Serve with Juices: Drizzle pan drippings over the meat for extra flavor and shine.
“A beautifully carved turkey is the perfect ending to your culinary journey.”
Final Thoughts: Ensuring a Perfect Turkey Every Time
Mastering the art of cooking a moist turkey isn’t as hard as it seems. With proper preparation, careful monitoring, and a few insider tips, you can serve a turkey that’s juicy, flavorful, and unforgettable. Remember, every step you take—from brining to resting—makes a difference.
FAQs
How do I keep my turkey moist while cooking?
To keep your turkey moist, consider brining it before cooking, using a meat thermometer to avoid overcooking, and basting it with its own juices or butter. Resting the turkey after cooking is also crucial to lock in moisture.
Is it better to cook turkey covered or uncovered?
Both methods work, but a combination is ideal. Cover the turkey with foil during the first half of cooking to retain moisture, then uncover it during the last 30 minutes to achieve crispy skin.
What’s the best way to brine a turkey?
You can use either a wet or dry brine. A wet brine involves submerging the turkey in a saltwater solution with herbs and spices, while a dry brine uses a salt rub. Both methods enhance moisture and flavor.
Can I use butter under the skin of the turkey?
Absolutely! Rubbing butter under the skin helps to keep the meat moist and infuses it with rich flavor. Combine the butter with herbs and garlic for an extra delicious touch.
How long should I let my turkey rest after cooking?
Let your turkey rest for 20-30 minutes after cooking. This allows the juices to redistribute throughout the meat, ensuring every bite is juicy and tender.
What can I do if my turkey turns out dry?
If your turkey is dry, serve it with plenty of gravy or moist sides like mashed potatoes and cranberry sauce. You can also shred the meat and mix it with mayonnaise for turkey salad.
Should I baste my turkey?
Basting can help keep the surface moist, but it’s not essential. If you choose to baste, do it every 30-45 minutes. Alternatively, consider using butter under the skin or self-basting turkeys.
How do I know when my turkey is done?
Use a meat thermometer to check the internal temperature. The breast should reach 165°F, and the thighs should reach 175°F. Avoid relying on pop-up timers as they may not be accurate.
Can I cook the stuffing inside the turkey?
You can, but make sure the stuffing reaches an internal temperature of 165°F to be safe to eat. Keep in mind that cooking stuffing inside the bird may increase the overall cooking time.
What size turkey should I buy?
Plan for about 1 to 1.5 pounds of turkey per person. This ensures there’s enough for the meal and leftovers.
Conclusion
Cooking a moist turkey is no longer a mystery! By following these tips, you can transform any turkey into a tender and juicy masterpiece that your family and friends will rave about. Remember, the key lies in preparation, temperature control, and giving your turkey the care it deserves. Whether it’s brining, using a thermometer, or letting it rest, each step makes a difference.
So, embrace these techniques, and enjoy your turkey as the true centerpiece of your feast. Here’s to delicious meals and unforgettable moments around the table. Cheers to your perfectly moist turkey!

