Hey there, fellow baking enthusiasts! Get ready to create a show-stopping dessert that’s as delicious as it is beautiful. This Vanilla Strawberry Ombre Cake isn’t just any ordinary layer cake – it’s a gorgeous gradient of pink hues that’ll make everyone’s jaws drop at your next celebration!
What is an Ombre Cake?
Before we dive into the recipe, let’s talk about what makes an ombre cake special. Think of a sunset gradually changing from deep pink to soft blush to creamy white – that’s exactly what we’re creating here! The word “ombre” comes from French, meaning “shaded,” and that’s precisely what we’re achieving with our buttercream layers.
“Baking is both an art and a science. With ombre cakes, we’re truly bringing both together to create edible masterpieces!” – Professional Baker’s wisdom
Why You’ll Love This Recipe
Let me tell you why this cake is about to become your new favorite recipe:
First off, it’s totally customizable! Just like mixing watercolors, you can adjust the intensity of your pink shades to match any celebration theme. And while it looks totally professional, I promise you don’t need to be a pastry chef to nail this recipe.
Plus, the combination of classic vanilla cake layers with fresh strawberry buttercream creates a flavor profile that’s absolutely irresistible. It’s like having the best of both worlds – elegant design meets crowd-pleasing taste!
Essential Ingredients & Equipment
Key Ingredients
Let’s break down everything you’ll need for this stunning creation:
| Cake Ingredients | Quantity | Notes |
|---|---|---|
| All-purpose flour | 3 cups | Room temperature |
| Granulated sugar | 2 cups | |
| Unsalted butter | 1 cup | Softened |
| Large eggs | 4 | Room temperature |
| Vanilla extract | 2 tsp | Pure, not imitation |
| Whole milk | 1 cup | Room temperature |
| Baking powder | 2 tsp | |
| Salt | 1/2 tsp |
| Buttercream Ingredients | Quantity | Notes |
|---|---|---|
| Unsalted butter | 4 cups | Softened |
| Powdered sugar | 8 cups | Sifted |
| Fresh strawberry puree | 1 cup | Strained |
| Heavy cream | 1/4 cup | |
| Pink gel food coloring | As needed | |
| Salt | 1/4 tsp |
Required Baking Tools
To create this masterpiece, you’ll need:
- 3 8-inch round cake pans
- Stand mixer or hand mixer
- Offset spatula
- Bench scraper
- Cake turntable (recommended)
- Piping bags
- Digital scale (for best results)
Step-by-Step Baking Instructions
Making the Perfect Vanilla Cake Layers
Let’s start with the foundation of our ombre masterpiece!
- Preheat your oven to 350°F (175°C). Think of your oven as a cozy sweater for your cake – it needs to be just the right temperature to work its magic!
- Prepare your cake pans by greasing them thoroughly and lining with parchment paper. This is like giving your cake an insurance policy against sticking!
“The secret to a perfectly moist cake? Room temperature ingredients! They blend together like best friends at a party, creating the perfect texture.”
Here’s a pro tip you won’t find in most recipes: after mixing your batter, tap each filled pan gently on the counter three times. This helps release any trapped air bubbles that could create holes in your finished cake.
For the actual mixing process:
- Cream butter and sugar until light and fluffy (about 5 minutes)
- Add eggs one at a time, mixing well after each addition
- Alternate adding dry ingredients and milk, starting and ending with dry ingredients
Your batter should be smooth and silky, kind of like a thick milkshake!
Creating the Strawberry Buttercream
Now comes the fun part – creating that gorgeous pink ombre effect!
Let’s start with making our luscious strawberry buttercream. The key to perfect buttercream is starting with butter that’s just right – like Goldilocks, not too hard and not too soft! Here’s a pro tip: when you press your finger into the butter, it should leave a slight indent but not sink right through.
First, make your strawberry puree:
- Blend fresh strawberries until smooth
- Strain through a fine-mesh sieve
- Reduce on low heat until thickened
“The secret to intense strawberry flavor without compromising texture? Reduce your puree until it’s half its original volume. This concentrates the flavor while removing excess moisture!”
For the buttercream:
- Beat softened butter until creamy (about 3 minutes)
- Gradually add sifted powdered sugar
- Mix in strawberry puree and a pinch of salt
- Add cream as needed for perfect consistency
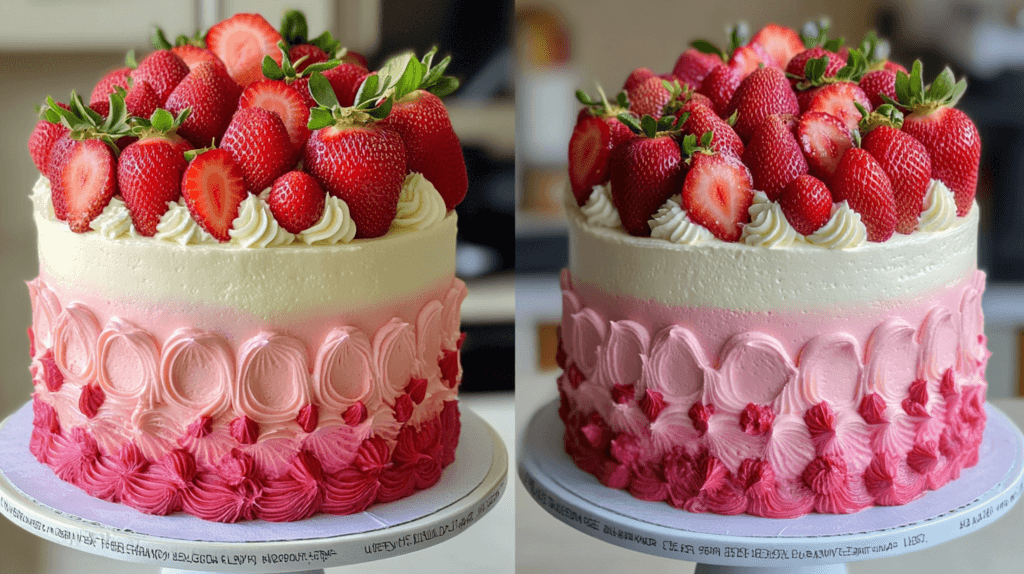
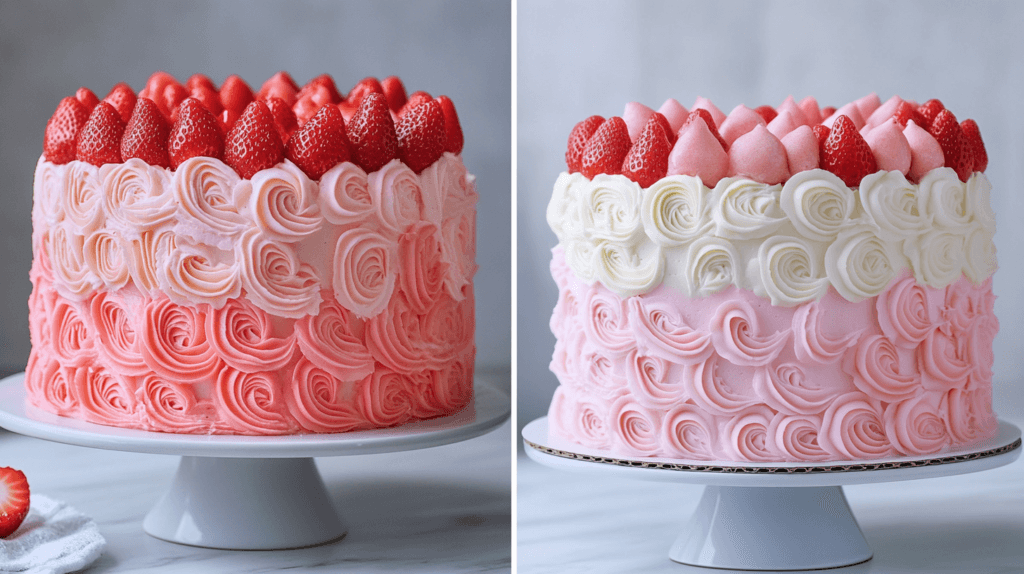
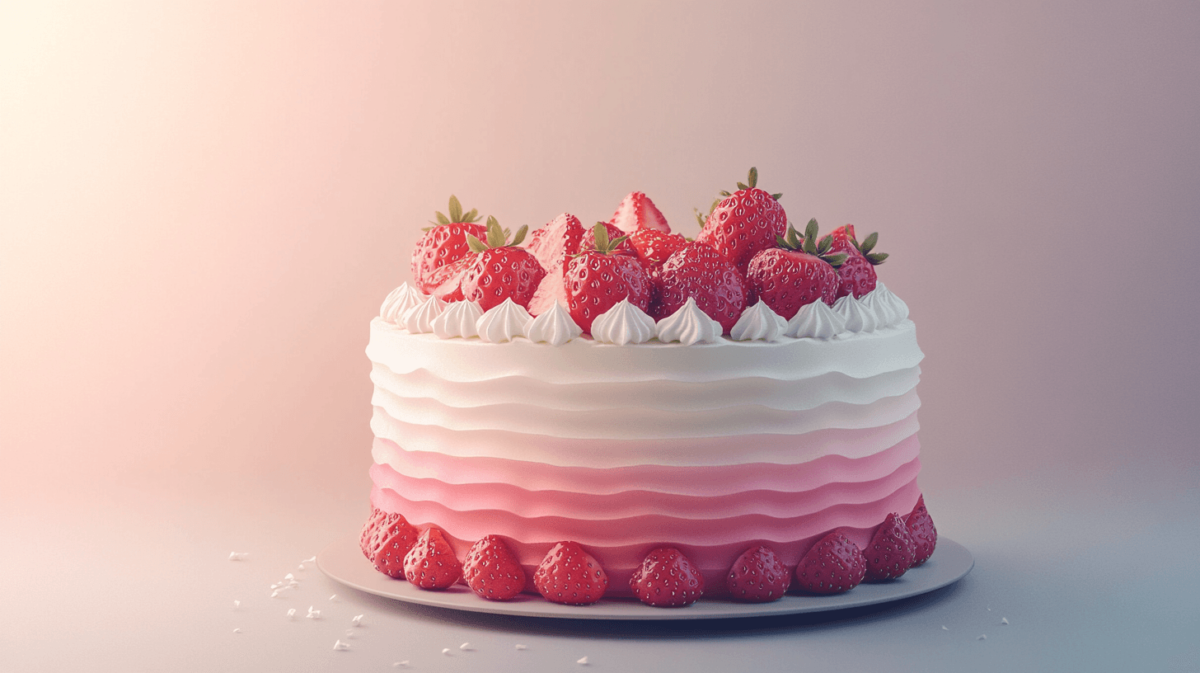
Achieving the Perfect Ombre Effect
Here’s where the magic happens! Think of yourself as an artist creating a sunset – each shade flowing perfectly into the next. Let’s break it down:
- Divide your buttercream into 4 portions:
- Leave one portion white
- Add a tiny drop of pink coloring to the second
- Add more color to the third
- Create the deepest shade for the fourth
| Portion | Amount of Coloring | Shade Description |
|---|---|---|
| Base | None | Pure white |
| Top tier | 1 drop | Barely blushing |
| Middle | 2-3 drops | Soft pink |
| Bottom | 4-5 drops | Deep pink |
Common Problems & Solutions
Troubleshooting Cake Texture Issues
Let’s tackle some common cake emergencies!
- Dense Cake
- Problem: Your cake feels heavy as a brick
- Solution: Check your baking powder’s freshness and avoid overmixing. Remember, mix just until ingredients are combined!
- Dry Texture
- Problem: Cake feels like the Sahara Desert
- Solution: Don’t overbake! When a toothpick comes out with a few moist crumbs, it’s done. Think of it like cooking pasta – you want it al dente!
Fixing Buttercream Problems
Ever had buttercream throwing a tantrum? Here’s how to calm it down:
- Curdled Looking
- Problem: Buttercream looks grainy or separated
- Solution: The butter was likely too cold. Warm the bowl gently over a pot of hot water, then rewhip.
- Too Soft
- Problem: Buttercream won’t hold its shape
- Solution: Pop it in the fridge for 15-20 minutes, then rewhip. Think of it like giving your buttercream a quick power nap! 😴
Ombre Coloring Challenges
Getting that perfect gradient can be tricky, but I’ve got your back:
- Uneven Color Transitions
- Problem: Harsh lines between colors
- Solution: Blend while the buttercream is fresh using a bench scraper held at a 45-degree angle
- Colors Too Dark
- Problem: Ended up with hot pink instead of soft rose
- Solution: Remember, you can always add more color, but you can’t take it away. Start with a tiny drop and build up gradually!
Storage & Make-Ahead Tips
Your gorgeous creation needs proper care!
Storage Guidelines:
- Room temperature: Up to 2 days
- Refrigerated: Up to 1 week
- Frozen: Up to 3 months
| Storage Method | Temperature | Duration | Notes |
|---|---|---|---|
| Counter | 70°F/21°C | 2 days | Cover with cake dome |
| Refrigerator | 40°F/4°C | 1 week | Wrap well |
| Freezer | 0°F/-18°C | 3 months | Double wrap |
Variations & Customizations
Want to make this recipe your own? Here are some fantastic twists:
- Color Variations:
- Purple ombre for a galaxy effect
- Blue ombre for beach-themed parties
- Rainbow ombre for pride celebrations
- Flavor Combinations:
- Lemon cake with raspberry ombre
- Chocolate cake with mocha ombre
- Almond cake with cherry ombre
Serving Suggestions
Make your cake presentation Instagram-worthy!
- Add fresh strawberries on top
- Sprinkle with edible glitter
- Create a chocolate drip effect
- Add fresh flowers around the base
“Remember, we eat with our eyes first! Take that extra minute to make your presentation special – it’s like putting a beautiful frame around a masterpiece.”
And there you have it, baking friends! With these tips, tricks, and troubleshooting guides, you’re ready to create your own stunning Vanilla Strawberry Ombre Cake. Remember, practice makes perfect, and even if your first attempt isn’t bakery-window worthy, it’ll still taste amazing!
Frequently Asked Questions
Got questions? I’ve got answers! Here are the most common questions I receive about making this Vanilla Strawberry Ombre Cake 🤔
Can I make this cake in advance?
Absolutely! You can bake the cake layers up to a month ahead and freeze them. Just wrap them well in plastic wrap and aluminum foil. The assembled cake can be made 2-3 days in advance and stored in the refrigerator.
Can I use box cake mix instead?
While you can use a box mix as a shortcut , I recommend following this homemade recipe for the best texture and flavor. The homemade version holds up better when stacked and stays moist longer.
How do I get the colors to blend perfectly?
Here’s my secret tip: slightly overlap each color as you apply them, then use your bench scraper held at a 45-degree angle while rotating your turntable. Keep smoothing until the colors blend naturally – like a beautiful sunset!
What if I don’t have gel food coloring?
You’ll want to use gel colors rather than liquid food coloring for this recipe. Liquid colors can make your buttercream too runny and won’t give you those vibrant shades we’re looking for.
Can I make this into cupcakes?
Yes! This recipe makes about 24-30 cupcakes. Divide your buttercream into the same ombre shades and pipe swirls using a large star tip. So cute!
“Remember, the key to success with this cake isn’t perfection – it’s patience and practice. Each time you make it, you’ll discover new techniques that work best for you!”
| Common Question | Quick Answer |
|---|---|
| Cake pan size alternatives? | 6″ (4 layers) or 9″ (2 layers) |
| Shelf life? | 2 days room temp, 1 week refrigerated |
| Substitute for fresh strawberries? | Freeze-dried strawberry powder |
| Make it dairy-free? | Use plant-based butter and milk |
Conclusion
Congratulations! You’re now equipped with everything you need to create a stunning Vanilla Strawberry Ombre Cake that’ll have everyone asking for the recipe. Remember, what makes this cake special isn’t just its beautiful appearance – it’s the love and care you put into making it.
Don’t be discouraged if your first attempt isn’t perfect. Like any art form, creating the perfect ombre effect takes practice. But here’s the best part: even if the gradient isn’t exactly as planned, you’ll still have a delicious cake that’ll bring smiles to everyone’s faces!
“Baking isn’t just about following recipes – it’s about creating memories, sharing joy, and celebrating life’s sweet moments.”
Keep experimenting with different color combinations and flavor variations. Who knows? You might even develop your own signature version of this stunning dessert!
Ready to start baking? Grab your ingredients, preheat that oven, and let’s create some magic in the kitchen! Don’t forget to share your creations and tag us in your photos – we love seeing your beautiful ombre cakes!
More Delightful Desserts to Try
If you’re enchanted by the elegance of the Vanilla Strawberry Ombre Cake, why not explore more delicious treats? The Strawberry Honeybun Cake with Strawberry Cream Icing offers a rich, fruity twist on a classic favorite. If you love light and airy textures, the Fluffy Cottage Cheese Cloud Bread is a unique, soft delight. For a simple yet elegant dessert, try the Strawberries & Cream Pastry Puffs—perfectly flaky and filled with luscious cream. If you’re in the mood for indulgence, the Decadent Chocolate Coconut Poke Cake delivers deep chocolate flavors with a hint of coconut goodness. And for a bite-sized twist on a favorite, the Raspberry Swirl Shortbread Cookies combine buttery richness with tart raspberry sweetness. Happy baking! 🍓🍰✨
Need more baking inspiration or have questions? Feel free to reach out through the comments section below. Happy baking, friends! 🥳
Vanilla Strawberry Ombre Cake
Ingredients
- A stunning three-layer vanilla cake featuring a gradient pink strawberry buttercream frosting decorated with fresh strawberries and delicate piped details. Perfect for special occasions, birthdays, and celebrations.
INGREDIENTS:
For the Vanilla Cake:
- 3 cups all-purpose flour
- 2 cups granulated sugar
- 1 cup unsalted butter softened
- 4 large eggs room temperature
- 2 teaspoons pure vanilla extract
- 1 cup whole milk room temperature
- 2 teaspoons baking powder
- 1/2 teaspoon salt
For the Strawberry Buttercream:
- 4 cups unsalted butter softened
- 8 cups powdered sugar sifted
- 1 cup fresh strawberry puree from about 2 cups fresh strawberries
- 1/4 cup heavy cream
- Pink gel food coloring
- 1/4 teaspoon salt
For Decoration:
- 2 cups fresh strawberries
- White pearl sprinkles optional
Instructions
Make the Cake:
- Preheat oven to 350°F (175°C)
- Grease and line three 8-inch cake pans
- Cream butter and sugar until light and fluffy (5 minutes)
- Add eggs one at a time, then vanilla
- Alternate adding dry ingredients and milk
- Divide batter evenly between pans
- Bake for 25-30 minutes
Make the Buttercream:
- Beat butter until creamy
- Gradually add powdered sugar
- Mix in strawberry puree
- Add cream as needed for consistency
- Divide into 4 portions for ombre effect
- Add varying amounts of pink coloring
Assembly:
- Level cake layers if needed
- Stack with buttercream between layers
- Create ombre effect with different shades
- Decorate with fresh strawberries
Notes