The Ultimate No-Bake Peanut Butter Oat Cups: A Game Changer That’s Freakin’ Delicious
Oh my goodness, let me tell you about these No-Bake Peanut Butter Oat Cups – they’re seriously the ultimate treat that’ll save your life when chocolate cravings hit, and trust me, this recipe is a total game changer. I remember the first time I made these during a marathon study session; they disappeared faster than I could snap a photo. These aren’t just any ordinary dessert – they’re like having a peanut butter cup but next level, with that perfect crunch that gets everyone asking, “How did you make these?” Simple is the magic word here, folks!
Why You’ll Love These Freakin’ Delicious Oat Cups
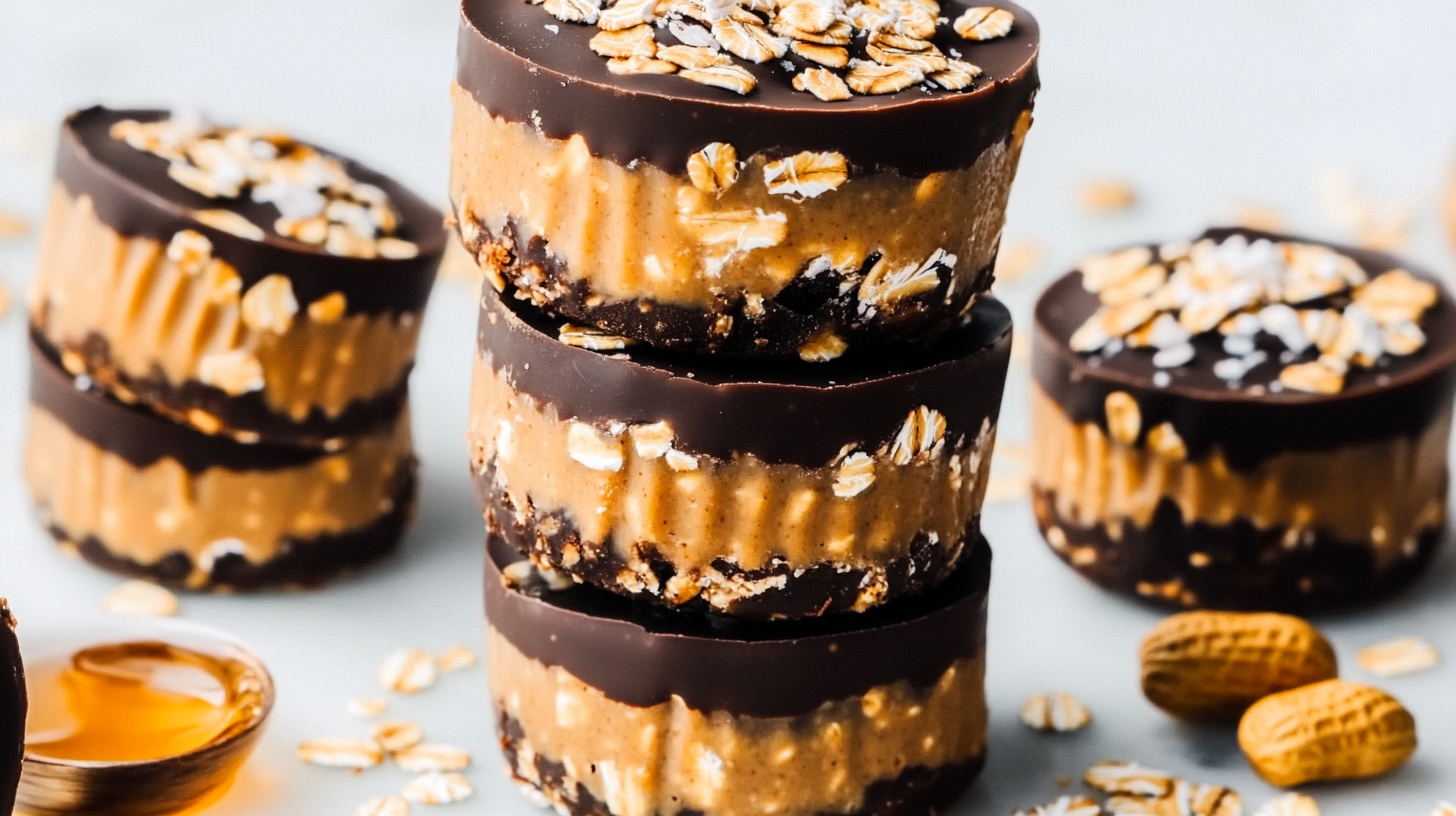
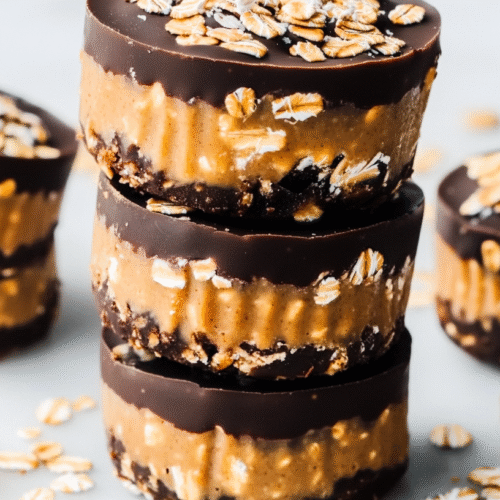
Listen up, because these bad boys are about to rock your world! The combination of silky natural peanut butter, nutrient-packed oats, and that melty chocolate top layer is absolutely irresistible. What makes this recipe so special is that it uses pantry staples you probably already have, and there’s zero baking required – perfect for those hot summer days or when you need dessert yesterday. The texture is where the magic happens: crispy oat bottom, creamy peanut butter middle, and that glossy chocolate finish that makes them look like you spent hours in the kitchen. Pro tip: these store beautifully for meal prep!
Ingredients
Oat Base:
- 2 cups quick oats (certified gluten-free if needed)
- 1/3 cup peanut butter (natural, creamy)
- 1/4 cup honey or maple syrup
- 2 tablespoons coconut oil, melted
- 1/4 teaspoon salt
- 1/2 teaspoon vanilla extract
- 1 tablespoon almond milk (or any plant milk)
Chocolate Topping:
- 3/4 cup chocolate chips (dark or semi-sweet)
- 1 tablespoon coconut oil
- Pinch of sea salt
Optional Peanut Butter Filling:
- 1/4 cup peanut butter
- 2 tablespoons powdered sugar
- 1 tablespoon coconut oil
Optional Add-Ons:
- Crushed peanuts for topping
- Flaky sea salt
- Mini chocolate chips
- Shredded coconut
Instructions
Step 1: Prepare the Oat Base
First things first, line a muffin tin with cupcake liners – this is your secret weapon for easy removal later. In a large bowl, combine your oats, peanut butter, honey (or maple syrup), melted coconut oil, salt, and vanilla extract. Here’s the trick: mix everything with your hands! It might feel weird at first, but trust me, it’s the best way to get that perfect texture. Add the almond milk gradually until the mixture just holds together. You want it moist enough to press together but not soggy.
Step 2: Shape Those Beauties
Take about 2 tablespoons of mixture for each cup and press firmly into the lined muffin tins. This part is crucial – really pack it down with your fingers or the back of a spoon to create a solid base. I like to create a slight indentation in the center for that professional look. Pop these bad boys in the freezer for 15-20 minutes while you prep the chocolate.
Step 3: Melt the Chocolate
Here’s where beginners often mess up – chocolate can be tricky! Melt your chocolate chips and coconut oil in 30-second intervals in the microwave, stirring between each burst. Don’t overheat! You want it smooth as silk, not grainy. If you see it getting close to melted, just stir vigorously to finish melting with residual heat.
Step 4: Assembly Time
Remove your oat bases from the freezer. If you’re doing the filling layer (which I highly recommend – it’s next level delicious), mix the optional peanut butter, powdered sugar, and coconut oil until smooth. Add a teaspoon to each cup and press gently.
Now for the best part – top each cup with that gorgeous melted chocolate. I like to use a spoon to pour it right in the center and let it spread naturally. Sprinkle with toppings if using. Back in the freezer for 10 minutes to set that chocolate!
Step 5: The Big Reveal
Pop these beauties out of the muffin tin and prepare for compliments! Store them in the fridge where they’ll keep their perfect texture. The contrast between the crispy base and melty chocolate is absolutely chef’s kiss.
Storage and Reheating
These No-Bake Peanut Butter Oat Cups are actually better after chilling! Store them in an airtight container in the fridge for up to 5 days, or freeze for up to 3 months. When freezing, layer them between parchment paper to prevent sticking.
Want to eat them warm? Zap one in the microwave for 10-15 seconds for a gooey, melty experience. Just be careful with the chocolate – it gets molten hot quickly!
FAQ
Q: Can I use old-fashioned oats instead of quick oats? A: Absolutely! Just pulse them in a food processor for 5-10 seconds first. Quick oats help achieve that perfect texture faster, but old-fashioned oats will work just fine.
Q: My oat base is crumbling – what went wrong? A: Usually, this means the mixture needs more binding liquid. Add almond milk one teaspoon at a time until it holds together. Also, make sure you’re using natural peanut butter (the oil helps bind everything).
Q: Can I make these vegan? A: Yes! Just use maple syrup instead of honey and check that your chocolate chips are vegan-friendly. Many dark chocolate brands are naturally vegan.
Q: The chocolate cracked when I cut them – help! A: Let them sit at room temperature for 5 minutes before cutting. A hot, sharp knife also helps. It’s all about patience!
Variations That’ll Blow Your Mind
- Double Chocolate Dreams: Add 2 tablespoons cocoa powder to the oat base
- Tropical Twist: Mix in coconut and top with white chocolate
- Protein Power: Add a scoop of your favorite protein powder (reduce liquid slightly)
- Almond Joy Version: Use almond butter and top with coconut
- Salty Sweet: Sprinkle flaky sea salt generously on top
Conclusion
These No-Bake Peanut Butter Oat Cups aren’t just a recipe – they’re a revolution in your dessert game! Perfect for potlucks, holiday cookie exchanges, or when you need to impress someone special, these treats deliver every single time. What I love most about this recipe is how it brings people together. There’s something magical about sharing food made with love, and trust me, everyone who tries these will be asking for the recipe.
So go ahead, make these freakin’ delicious cups today, and don’t be surprised when you become the designated dessert person in your friend group. Drop a comment below if you try them – I want to hear about your variations and mishaps (we’ve all had those chocolate-melting disasters, right?). Happy baking… or should I say, happy no-baking!
No-Bake Peanut Butter Oat Cups
Equipment
- Muffin Tin
- Microwave
Ingredients
Oat Base
- 2 cups quick oats certified gluten-free if needed
- 1/3 cup peanut butter natural, creamy
- 1/4 cup honey or maple syrup
- 2 tbsp coconut oil melted
- 1/4 tsp salt
- 1/2 tsp vanilla extract
- 1 tbsp almond milk or any plant milk
Chocolate Topping
- 3/4 cup chocolate chips dark or semi-sweet
- 1 tbsp coconut oil
- sea salt pinch, for garnish
Optional Peanut Butter Filling
- 1/4 cup peanut butter
- 2 tbsp powdered sugar
- 1 tbsp coconut oil
Instructions
- Line a muffin tin with liners. In a bowl, mix oats, peanut butter, honey or maple syrup, melted coconut oil, salt, vanilla, and almond milk. Mix until combined and holds shape.
- Press about 2 tablespoons of the mixture into each muffin cup, firmly creating a base. Freeze for 15–20 minutes.
- Melt chocolate chips and 1 tbsp coconut oil in the microwave in 30-second intervals, stirring until smooth.
- (Optional) Combine peanut butter, powdered sugar, and coconut oil. Spoon a teaspoon on each oat base.
- Spoon melted chocolate over each cup. Sprinkle sea salt or other toppings if using. Chill for 10 minutes to set.
- Remove from muffin tin and store in the fridge up to 5 days or freezer up to 3 months.