Dutch oven bread has quickly become a favorite for home bakers looking to create artisan-quality loaves without the need for professional equipment. Known for its crisp, golden crust and soft, airy interior, this type of bread is not only delicious but also surprisingly simple to make. The Dutch oven—a heavy, lidded pot typically made of cast iron—mimics the steam-injected ovens used in bakeries, allowing the dough to rise fully and develop a signature crust.
The popularity of Dutch oven bread lies in its versatility and reliability. Whether you are a beginner or an experienced baker, this method ensures consistent results. All you need are a few basic ingredients—flour, water, yeast, and salt—and the Dutch oven does the heavy lifting. The enclosed space creates a humid environment, which allows the bread to develop its characteristic crust and chewy texture.
In this article, we will explore the benefits of baking with a Dutch oven, provide a foolproof recipe, troubleshoot common problems, and share tips for perfecting your loaf every time. By the end, you’ll be ready to bake fresh, homemade bread that rivals any artisanal bakery.
The Benefits of Baking Bread in a Dutch Oven
Baking bread in a Dutch oven has become a game-changer for home bakers worldwide. Whether you’re a novice or a seasoned bread enthusiast, the unique characteristics of a Dutch oven allow you to bake bread with exceptional results every single time. Here are the key benefits of baking bread in a Dutch oven:
Superior Moisture Retention for Perfect Crust
One of the standout features of baking bread in a Dutch oven is its ability to retain moisture. The tightly sealed lid traps steam within the pot, replicating the conditions of professional bakery ovens.
- Why is steam important? During the initial stages of baking, steam prevents the surface of the dough from drying out too quickly. This allows the bread to expand fully, creating a light and airy crumb while achieving a golden, crispy crust.
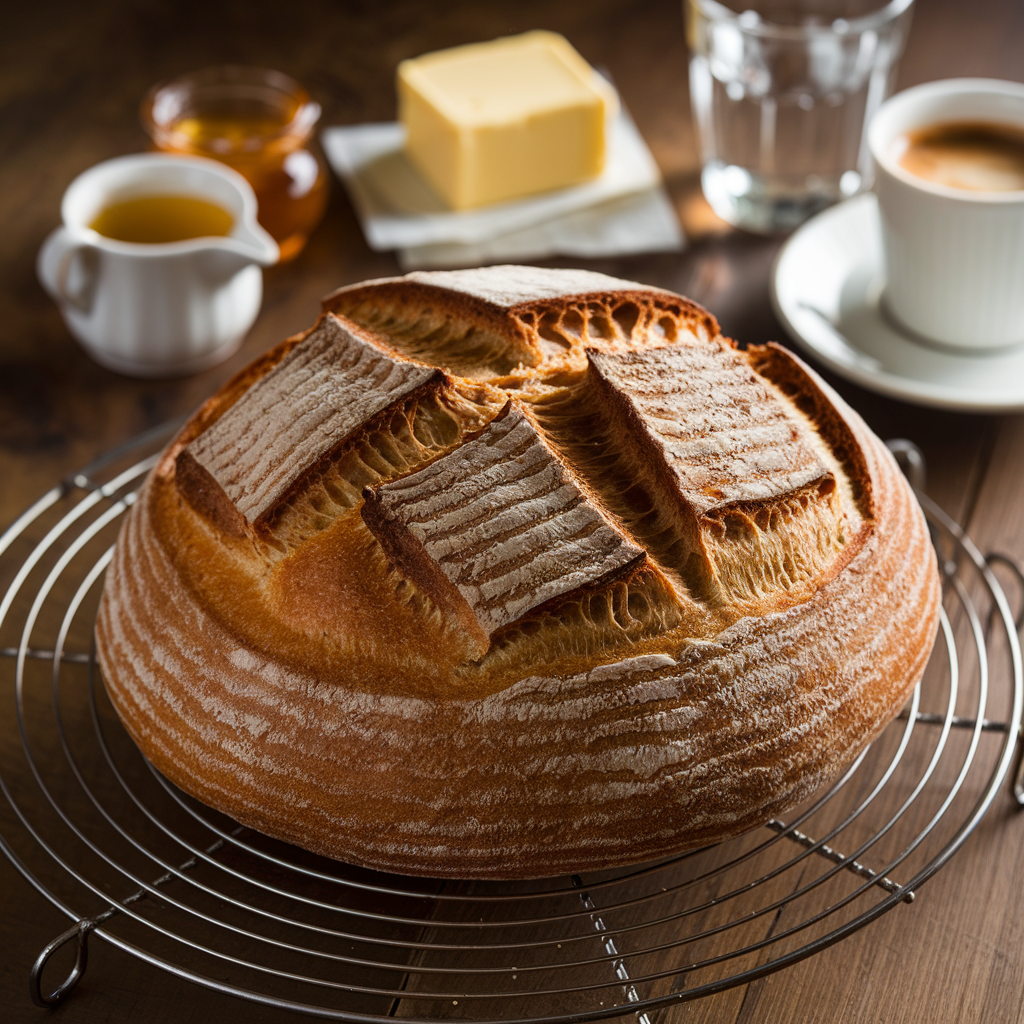
- The result? An artisan-style loaf with a crackly, blistered crust that looks and tastes as if it came straight from a bakery.
Without steam, the crust can harden prematurely, preventing the bread from achieving its maximum rise. The Dutch oven eliminates this problem by creating a self-contained, humid environment that naturally enhances the bread’s texture.
Even Heat Distribution for Consistent Results
Dutch ovens, particularly those made of cast iron, are renowned for their excellent heat retention and even heat distribution.
- Heat Retention: The thick walls of the Dutch oven store and radiate heat evenly, ensuring the bread bakes uniformly from all sides. This helps avoid unevenly baked loaves, which can often occur in standard ovens.
- Controlled Baking: The preheated Dutch oven delivers an intense burst of heat when the dough is placed inside, helping the loaf rise quickly—often referred to as “oven spring.”
The result is consistent baking results every time, regardless of your oven’s quirks or fluctuations in temperature.
Artisan-Quality Bread at Home
Before Dutch oven baking became popular, achieving artisan-style bread at home was a challenge. Professional bakeries use steam-injected ovens that provide the perfect conditions for bread baking. The Dutch oven essentially mimics these professional ovens, bringing bakery-quality results right to your kitchen.
Key Artisan Features Achieved in a Dutch Oven:
- Beautiful Crust: Golden, crispy, and evenly browned.
- Airy Crumb: A light, open interior structure with irregular holes.
- High Rise: Excellent oven spring, creating a tall, round loaf.
Not only does the Dutch oven simplify the bread-making process, but it also delivers bread that rivals the quality of any professional baker.
Beginner-Friendly and Forgiving
Baking bread may seem intimidating, but using a Dutch oven simplifies the process, making it accessible for bakers of all skill levels.
- Less Need for Precision: The steam created inside the Dutch oven makes up for small imperfections in dough hydration, kneading, or shaping. Even if your dough is slightly under-proofed or imperfectly shaped, the Dutch oven will still help you achieve a delicious loaf.
- No Special Tools Required: Unlike other bread-baking methods that require pizza stones, steam pans, or expensive equipment, the Dutch oven combines everything into one tool.
This makes it the perfect method for beginners looking to master homemade bread without overcomplicating the process.
Versatility Beyond Bread
While Dutch ovens are ideal for bread, they are incredibly versatile and can be used for a variety of other cooking methods, including stews, soups, braises, and even desserts. This makes investing in a Dutch oven a worthwhile decision for any home cook.
- Durability: Most Dutch ovens are made of cast iron and can last for decades with proper care.
- Multi-Functional: After baking bread, you can use your Dutch oven for countless recipes, from savory dishes to sweet treats.
Whether you’re baking a sourdough loaf or preparing a slow-cooked meal, the Dutch oven remains an essential kitchen tool.

Essential Ingredients and Equipment for Dutch Oven Bread
Baking Dutch oven bread doesn’t require a long list of ingredients or complicated tools. At its core, this recipe uses simple pantry staples, and with the right equipment, you’ll be able to achieve professional-quality bread every time.
Core Ingredients for Dutch Oven Bread
Dutch oven bread is rooted in simplicity, which is why it only needs four essential ingredients:
- Flour
- All-Purpose Flour: Perfect for beginner bakers, all-purpose flour is versatile and produces a reliable loaf with a tender crumb.
- Bread Flour: With its higher protein content (12-14%), bread flour yields a chewier texture and better gluten development, which is ideal for artisan bread.
- Whole Wheat Flour: For a nuttier flavor and added nutrition, mix whole wheat flour with all-purpose or bread flour. However, whole wheat flour alone may result in a denser loaf.
- Water
- Water is vital for hydration, gluten formation, and creating steam during baking. Use lukewarm or room-temperature water (about 75°F to 80°F) to activate the yeast without killing it.
- Yeast
- Instant Yeast: Also known as rapid-rise yeast, it’s ideal for quick and straightforward bread recipes since it doesn’t require activation in water beforehand.
- Active Dry Yeast: Slightly slower to activate but still works well. Be sure to dissolve it in warm water first.
- Sourdough Starter: For bakers looking to explore natural leavening, sourdough starter can replace commercial yeast, adding depth of flavor and a slightly tangy taste.
- Salt
- Salt enhances the bread’s flavor and strengthens the gluten structure. For best results, use fine sea salt or kosher salt, as they dissolve evenly into the dough.
Optional Ingredients for Flavor Enhancements
While classic Dutch oven bread thrives on simplicity, you can customize it with additional ingredients for more flavor:
- Herbs and Spices: Add rosemary, thyme, garlic powder, or cracked black pepper to the dough for aromatic bread.
- Seeds and Nuts: Incorporate sunflower seeds, flaxseeds, or chopped nuts for added texture and nutrition.
- Cheese: Fold shredded cheese like cheddar, parmesan, or gruyere into the dough for a rich, savory loaf.
- Sweet Additions: Add honey, raisins, cranberries, or cinnamon for a sweeter variation of Dutch oven bread.
Essential Equipment for Baking Dutch Oven Bread
To achieve perfect Dutch oven bread, having the right tools is just as important as the ingredients. Here’s what you’ll need:
- Dutch Oven
- A Dutch oven is the star of this recipe. The heavy, lidded pot traps steam and radiates heat evenly, ensuring the bread bakes to perfection.
- Material: Cast iron is the best choice for its excellent heat retention. Enamel-coated Dutch ovens work well and are easier to clean.
- Size: A 4 to 6-quart Dutch oven is ideal for most standard bread recipes. It allows enough space for the dough to rise without overcrowding.
- Kitchen Scale
- Measuring your ingredients by weight rather than volume ensures accuracy, which is key to consistent results. A digital scale is highly recommended for precision.
- Mixing Bowls
- Use a large mixing bowl to combine and proof the dough. A bowl with enough space for the dough to double in size is ideal.
- Bench Scraper
- A bench scraper helps you handle, cut, and shape sticky dough easily without making a mess.
- Parchment Paper
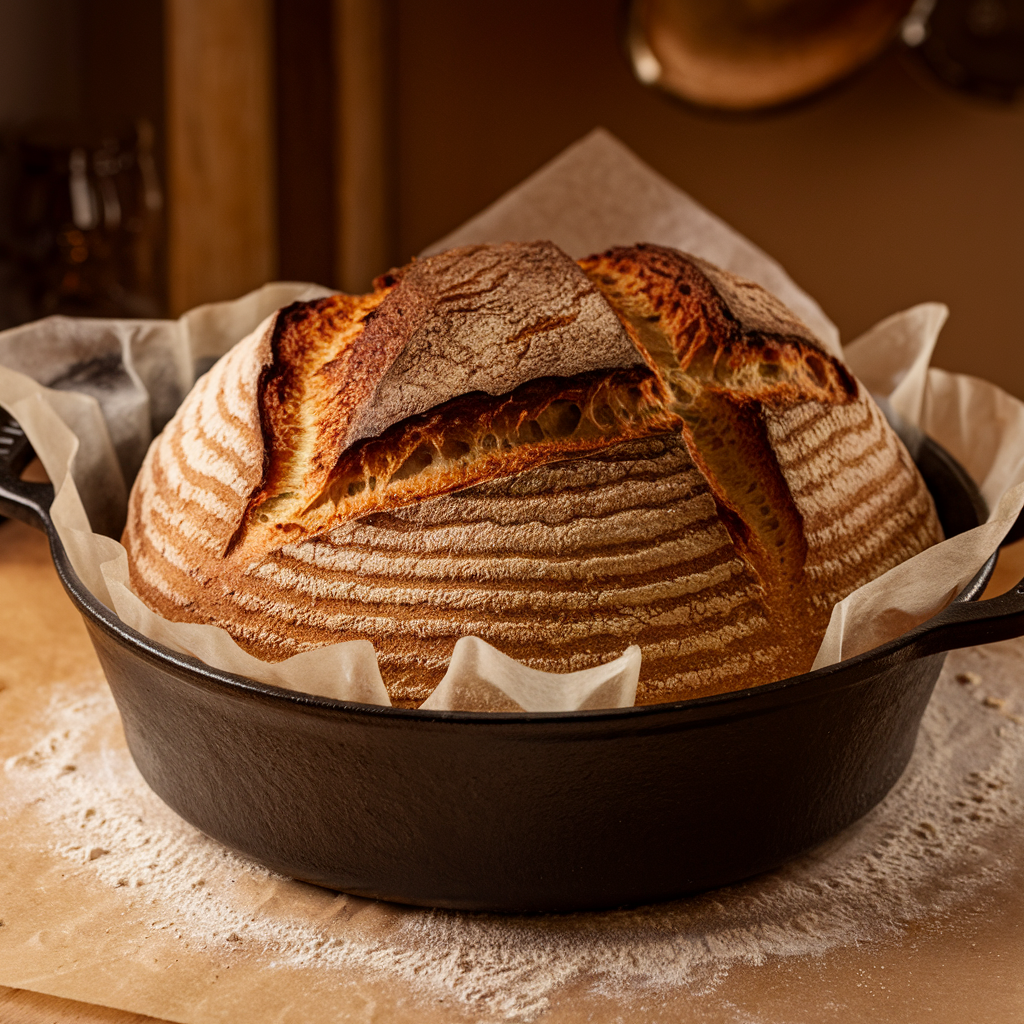
- Parchment paper makes transferring dough into the hot Dutch oven safer and prevents sticking. It’s also easier to clean up afterward.
- Proofing Basket (Optional)
- A proofing basket (banneton) gives your dough structure during its final rise and leaves attractive patterns on the crust. If you don’t have one, a clean bowl lined with a floured kitchen towel works just as well.
- Oven Mitts or Heat-Resistant Gloves
- Dutch ovens get extremely hot during baking, so quality oven mitts or heat-resistant gloves are essential for safely handling the pot.
Choosing the Right Dutch Oven
Not all Dutch ovens are created equal, so choosing the right one for bread baking can make a difference. Here are some factors to consider:
- Material:
- Cast Iron: Best for heat retention and durability. Ideal for baking bread with a crisp crust.
- Enamel-Coated: Easier to clean and maintain but may not handle extreme heat as well as bare cast iron.
- Shape:
- A round Dutch oven is perfect for round loaves, while an oval one works for elongated loaves. Choose the shape that fits your preferred bread style.
- Lid:
- A tight-fitting lid is critical for trapping steam and creating the perfect baking environment.
- Brand:
- Popular brands like Le Creuset, Lodge, and Staub are highly recommended for their durability and performance. However, more affordable options are available and work well, too.

FAQs
Here are the most commonly asked questions about baking Dutch oven bread, with detailed answers to help you perfect your loaf.
1. Why do I need a Dutch oven to bake bread?
A Dutch oven is ideal for baking bread because it creates a sealed, steam-filled environment during the initial stages of baking. Steam is essential for a crisp, golden crust and a soft, airy crumb. The Dutch oven mimics professional bakery ovens that inject steam, ensuring even heat distribution and excellent results at home.
If you don’t have a Dutch oven, alternatives like an oven-safe pot with a tight-fitting lid or a combination of baking stones and steam pans can work, but they may not deliver the same consistent results.
Yes, you can use most Dutch ovens to bake bread, but some factors will impact the results:
- Material: Cast iron Dutch ovens (either bare or enamel-coated) are preferred because they retain and distribute heat evenly.
- Size: A 4 to 6-quart Dutch oven is ideal for most bread recipes. Larger Dutch ovens may allow the dough to spread too much.
- Lid Fit: Ensure the lid fits tightly to trap steam effectively during baking.
Avoid Dutch ovens with plastic handles or coatings that cannot withstand high oven temperatures (above 450°F or 230°C).
3. Why is my Dutch oven bread not rising properly?
If your bread isn’t rising as expected, consider the following common causes:
- Inactive Yeast: Ensure your yeast is fresh and active. Expired or improperly stored yeast will not work.
- Under-Proofing: If the dough hasn’t had enough time to rise before baking, it won’t achieve its full potential. Allow the dough to double in size during proofing.
- Temperature Issues: A cold room or water that’s too hot/cold can affect yeast activity. The ideal water temperature is between 75°F to 80°F (24°C to 27°C).
- Too Much Flour: Over-flouring the dough can make it dense and prevent proper rise. Use a digital scale to measure flour accurately.
4. How do I prevent my bread from sticking to the Dutch oven?
Bread sticking to the Dutch oven is a common issue, but it can be avoided with these tips:
- Parchment Paper: Place the dough on parchment paper before lowering it into the Dutch oven. This prevents sticking and makes cleanup easier.
- Preheating: Always preheat the Dutch oven before adding the dough. A hot surface reduces sticking.
- Flouring the Surface: Dust the bottom of the Dutch oven or the parchment paper with flour or cornmeal to create a non-stick barrier.
Using a well-seasoned or enamel-coated Dutch oven also minimizes sticking.
5. Can I make Dutch oven bread without kneading the dough?
Yes! Many Dutch oven bread recipes follow a no-knead method, which is beginner-friendly and requires minimal effort. Here’s how it works:
- Mix the ingredients until just combined.
- Let the dough rest for 8 to 24 hours at room temperature. During this time, the gluten develops naturally.
- Shape the dough and bake it in a preheated Dutch oven.
The no-knead method is popular because it produces an artisan-quality loaf with little hands-on work. The long resting period allows for flavor development and a beautiful open crumb.
6. How do I know when my Dutch oven bread is done baking?
To ensure your bread is fully baked:
- Visual Check: The crust should be golden brown with a slightly darker color on top.
- Sound Test: Tap the bottom of the loaf. If it sounds hollow, the bread is done.
- Internal Temperature: Use a digital thermometer to check the internal temperature of the bread. It should read between 190°F and 205°F (88°C to 96°C).
If the crust looks perfect but the inside seems undercooked, bake the bread for an additional 5-10 minutes uncovered to firm up the crumb.
7. How do I store Dutch oven bread to keep it fresh?
Proper storage helps maintain the crust and texture of your Dutch oven bread:
- Short-Term: Store the bread in a paper bag or wrap it loosely in a clean kitchen towel. This allows the crust to stay crisp. Avoid plastic bags, as they trap moisture and make the crust soft.
- Long-Term: For longer storage, slice the bread, place it in a freezer-safe bag, and freeze it. To reheat, simply toast or warm the slices in the oven.
For best flavor and texture, enjoy the bread within 2-3 days of baking.
8. Can I use a sourdough starter instead of yeast for Dutch oven bread?
Absolutely! A sourdough starter can replace commercial yeast to make Dutch oven bread. Sourdough adds a tangy flavor and chewy texture while using natural fermentation for leavening.
Steps for Using Sourdough Starter:
- Replace the yeast with 1/4 to 1/2 cup of active sourdough starter.
- Increase the proofing time to accommodate the slower rise from natural yeast. This may take 6 to 12 hours depending on room temperature.
Baking with sourdough requires patience but results in a highly flavorful and nutritious loaf.
Conclusion
Dutch oven bread is a true testament to the art of simple, homemade baking. With just four essential ingredients—flour, water, yeast, and salt—you can create a beautiful, artisan-style loaf with a crisp, golden crust and soft, airy interior. The Dutch oven, with its ability to trap steam and distribute heat evenly, makes this method foolproof for both beginners and seasoned bakers alike.
What makes Dutch oven bread so special is its versatility and accessibility. Whether you’re following a classic recipe or experimenting with variations like herbs, seeds, or sourdough starters, the process remains straightforward and rewarding. Even without prior baking experience, you can achieve bakery-quality results right in your own kitchen.
As you’ve seen throughout this guide, a Dutch oven simplifies the bread-making process, eliminates guesswork, and consistently delivers exceptional loaves. By understanding the key ingredients, tools, and techniques—and troubleshooting common issues—you are now equipped to bake perfect Dutch oven bread every time.
So, preheat your oven, grab your Dutch oven, and start your bread-baking journey today. There’s nothing quite like the aroma of fresh bread filling your kitchen or the satisfaction of slicing into a loaf you’ve made with your own hands. Enjoy the process, and most importantly, enjoy the delicious results!

